Getting started
git8n edits the JSON locale files of a GitHub repository. A translator proposes texts, a reviewer publishes them, and each publication is a commit on the repository. This page goes from the first sign-in to that commit.
You need:
- the address of an editor, for example
https://git8n.example.com. To run your own, see Run it locally and Deploy; - for steps 2 and 3, an admin account: an address of
ADMIN_EMAILS; - a GitHub repository that holds one folder of JSON files for each language, for example
src/locales/en/common.json. A repository and its files gives the layout.
The screenshots come from the demo on the home page. Its repository, acme/shop, does not exist, and the demo sends nothing to GitHub.
1. Sign in
Open the editor, then choose one of the two ways:
- « Se connecter avec GitHub », with a GitHub account;
- « Recevoir un lien de connexion », for a person that a repository invited by address. The mail holds a link, and the person needs no GitHub account.
The first sign-in creates the account. A new account opens nothing until it is a member of a repository (step 3).
2. Connect a repository
An admin does this step once for each repository.
- Click « Brancher un dépôt ». GitHub opens the installation page of the GitHub App of the editor. Install it on the repository.
- GitHub sends you back to the editor. Pick the repository. The editor finds the folder of the locale files, the languages and the manifest.
- Check the form, then click « Brancher ce dépôt ».
The table of the repository opens, and you are its owner. A repository and its files gives each field of the form.
3. Give the rights
Open « Réglages », then « Membres ». Add a person by address or by GitHub login, and give them a role and their languages:
- a translator proposes texts in their languages;
- a reviewer also publishes the proposals of their languages;
- an owner also manages the members.
A person invited by address gets the mail of step 1. Accounts and rights gives every rule.
4. Translate
Open the repository and pick a language. The tab « Manquantes » lists the keys that the language does not hold yet. Write the texts, then click « Proposer ».
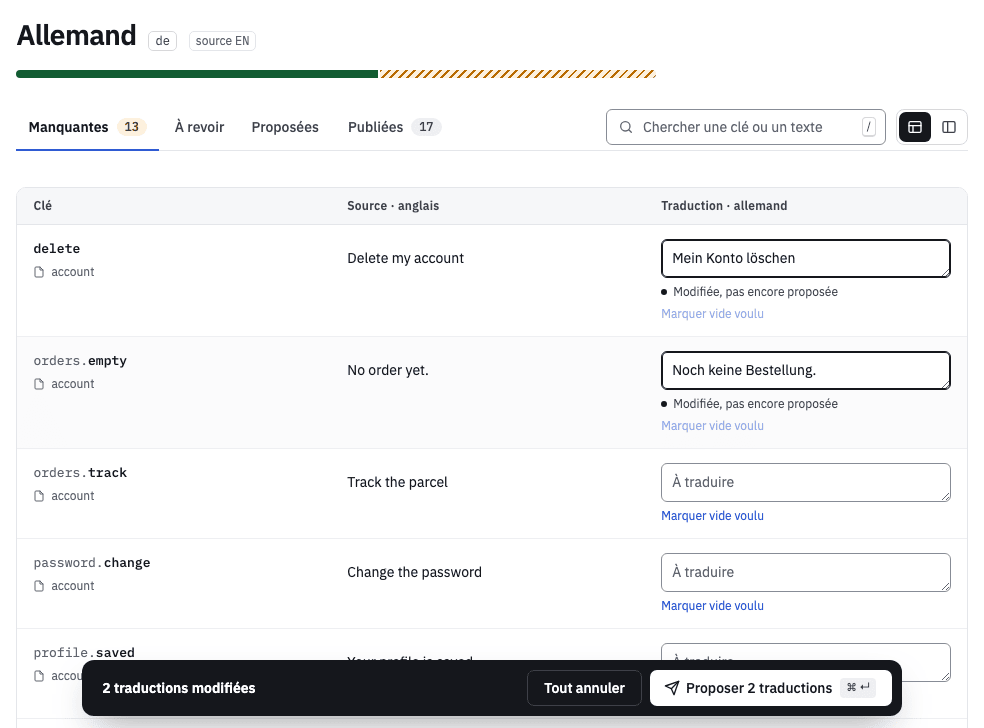
The proposal is one commit on the branch i18n/<language>. Nothing changes on the base branch yet.
5. Review and publish
A reviewer opens the tab « Proposées ». They tick the keys to publish in the column « Publier », then click « Publier » in the bar at the bottom.
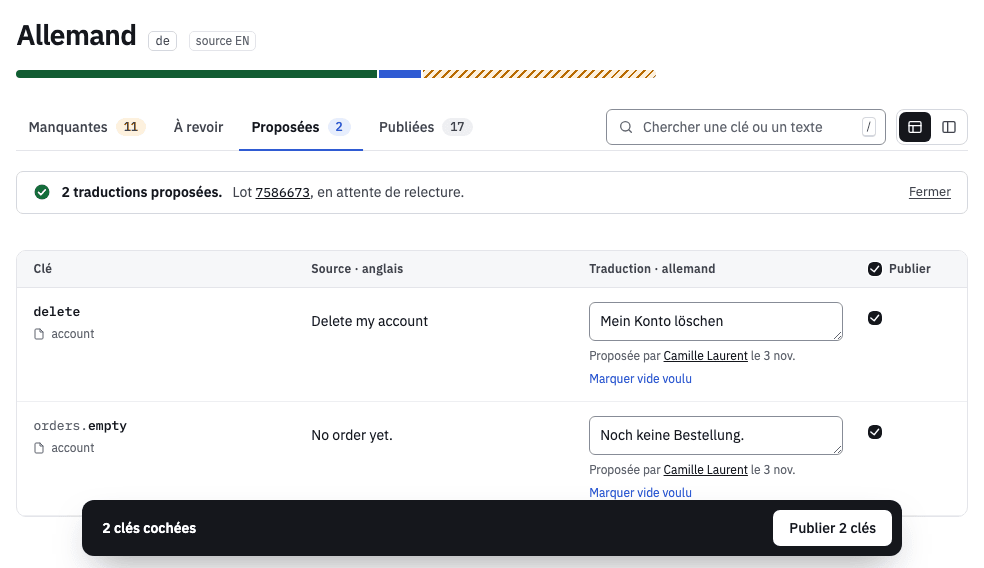
The editor writes the approved keys on the base branch, and says so.
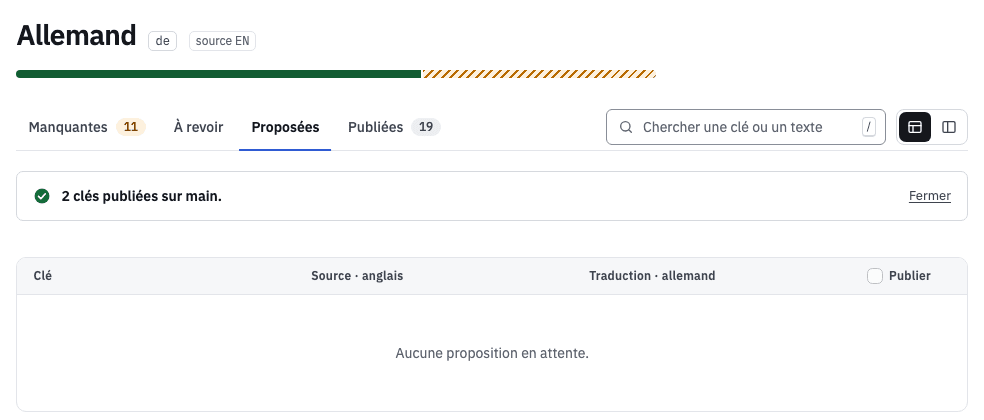
A key whose source text changed since the proposal is refused, with the reason. Concepts lists the reasons.
6. See the commit on GitHub
Open the history of the base branch on GitHub. The publication is one commit, made by the GitHub App. Its author is the name of the reviewer who published it (the author of a commit). If the repository publishes by pull request, the commit is on i18n/publish, and one pull request carries it to the base branch: how a publication reaches the base branch.
The links of the editor to a commit open it on GitHub.
Next
- Concepts: the catalogue, a proposal, a publication.
- MCP server: let an agent propose the texts.
- CLI: check the locale files in CI with
git8n check.